Get started
If you just need the files and no explanation, just click on one of those buttons :
If you want some explanation on how to actually use these files, just follow the next steps.
Presentation
In this tutorial we are going to install for the first time a lamamos system. That means that we are going to install lamamos on two computers and we are going to make them into a redundant system.
For the purpose of this tutorial we are using two virtual machines each one running a fresh install of debian.
Building the VMs
First of all, we are going to create the virtual machine (VM) on which we are going to install lamamos. In the end we want to end up with two VMs. But we can easily clone them so we are going to install what we need on one and then clone it to get the second server.
During this tutorial I will be using virtualbox. I am certain that other Virtualization software does exactly the same things but those things might be called differently.
First of all, we are going to create a new VM. We don't need much to make it 1G of RAM will be plenty and a hard drive of 10G will be enough for a test VM (7G for the system, 2G for the users' data and 1G of SWAP). Finally we are going to configure the networks. We need two connections : one to the internet (to fetch the software) and one to the other VM (to synchronize with it). To do so we are going to have to create a local network. In virtualbox go to file/preferences, select the network tab and add a new one to the list. Back into the configuration of your VM go to the network tab, leave the first network carte in NAT mode and go to the second network card and activate it in host-only adapter. By default it is going to select the network we just created.
We are ready to launch the VM. When you will do that you will be asked to provide an installation disc. Just pop in a regular debian. During the installation you will be asked a few questions :
- What is the primary network : The primary adapter is the one connected to internet in our case it is the one in NAT mode, so the 1st one (eth0).
- What is the name and hostname of the machine : leave it as default we will configure it later.
- Hard drive configuration : we want 3 partitions : 8G as the root file system. 1.7G not mounted anywhere (that partition will be shared between the servers). Finally 1G as SWAP.
- When asked which software we want to be installed remove everything except the standard system utilities (who needs windows when you've got lamas)
Configuring the network
You are going to have to configure the network of the two VMs. First of all clone the VM you just created. You now should be having 2 exactly identical VMs. We can launch one of them, log into it, and edit the file : /etc/network/interfaces. This file should already contain the configuration of the network connected to eth0 (our NAT network). We are going to add the configuration for the second network (the one that let the VMs communicate with each other). We just have to add at the end of this file :
allow-hotplug eth1
iface eth1 inet static
        address 192.168.56.250
        netmast 255.255.255.0
You can of course set whatever IP address you want, as long as it is compatible with the network you just created (in the virtualbox configuration). In my case I can use every IPs in the network : 192.168.56.
We are going to do the same thing with the second VM, but we need to configure it with an other IP than the first server. Keep those IPs written somewhere, they will be asked latter during the installation process. We just need to make sure that this new configuration is used by the VMs, so we need to reboot them.
Getting lamamos
To get the last version of the lamamos project, the simplest way is to clone directly the git repo :
git clone https://github.com/lamamos/lamamos_installation_script.gitIn this folder you just got to launch the installation script :
./install_lamamos.shThis installation is going to ask you a few questions among which :
- The hostname of the servers : This value will be configured by the script itself.
- The IP of the servers : the ones we just configured.
- The partition that will be used for the data (and will be shared across the servers).
- The IP that will be shared between the servers.
Once this configuration is done, the script is going to launch a bunch of installations, configurations and finally launch Rex for the first time. Rex is the software that is in charge of maintaining the configuration of the servers. After a bunch of installations Rex is going to reboot the VMs. At that point the installation is not done yet. Rex needs to be relaunched, you can wait for it (it is going to happen every 30 minutes), or if you don't want to wait, you can do (on both VMs) :
cd /etc/lamamos/rex/
rex configure
Once this is done you should have a fully functioning lamamos system. That mean redundancy in the applications : if one server fails, the other one going to take it's place. That also means redundancy in the data. You can play with it by adding file in the folder /data, and noticing the fact they are created on the other servers also (I talk about a shared volume, but it is not. Each server is accessing local data. But every modification made to this data is reproduced onto the other server).
Lamadmin
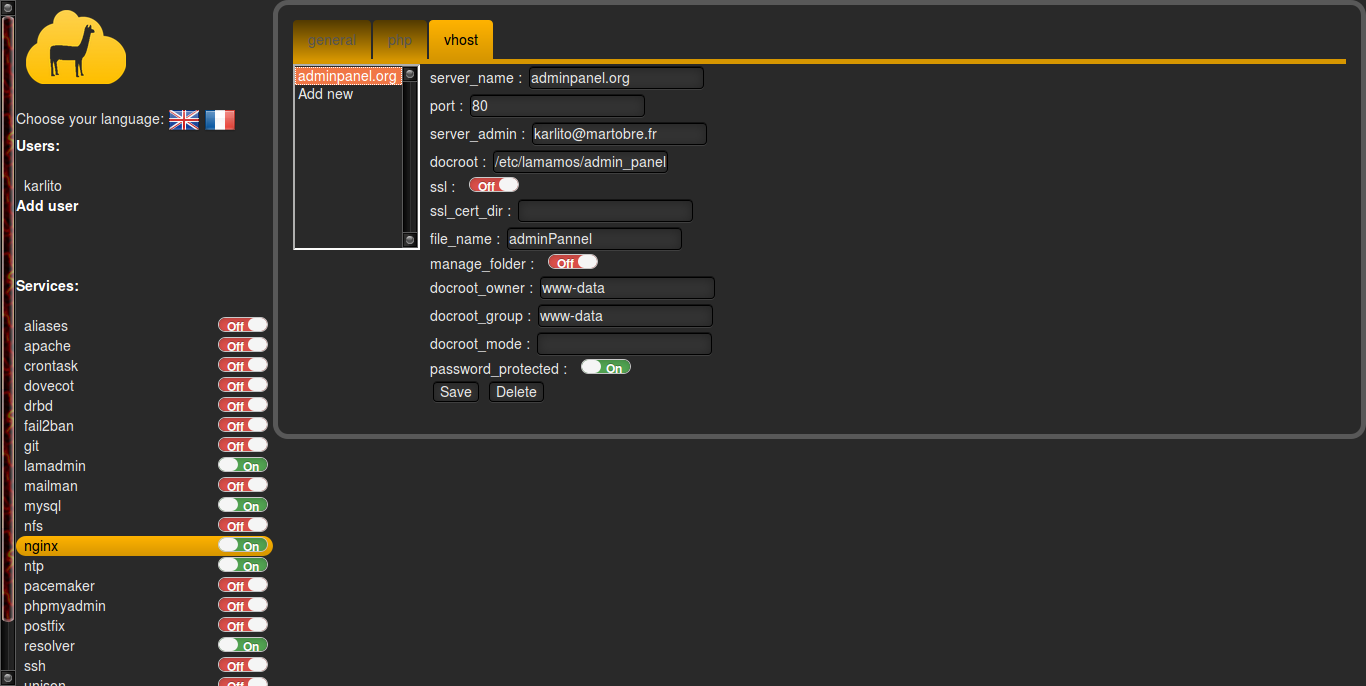
You can access the configuration interface of the servers at the IP that is shared by the servers.
Here you can configure most of the parameters of you servers. For example we can add a new vhost to our nginx installation by clicking on nginx on the sidebar. We got then the configuration of this module that appears on the central part of the window. As you can see we got 3 tabs. The tab called "general" is here for every modules. In that tab you'll find all the configuration that are related to the module by itself. In the case of nginx we don't have anything. The other tabs are referring to the submodules that are usable with nginx. In our case we can use php and vhosts. We then select vhost. Here you got a list on the left of all the instances of this submodule. In our case this is a list of all the vhost on our system. You can click on Add new at the bottom of the list to add a new vhost. Just fill in the parameters of the new vhost you want to add and then click save.
This operation os going to update the configuration file of the servers. This configuration file will be applied the next time that rex is called. This action is done every 30 minutes (using a cron job). If you don't want to wait that long you can still call rex by hand by going into the folder and calling rex :
cd /etc/lamamos/rex/
rex configure
And now what
Now you now how to use lamamos and lamadmin. As you may certainly have noticed, those softwares are quiet ugly, and are laking a lot of functionality. Nevertheless you might certainly be interested by this project and the ideas behind it. If this is the case I would encourage you to come and join us to build this idea of a personal server farm accessible to anyone. We need developers and non developers everything is to be done yet : code but also documentation, tutorials, graphics, drawing, communication, and ideas. If you are interested, please click on the button :